Designers of precision motion and positioning equipment usually deal with three types of errors: repeatability errors, non-linear accuracy errors, and linear errors caused by thermal effects.
Repeatability errors (or lack thereof) allow the motion system to return to the same point in space repeatedly and when approached from any direction; this is called bi-directional repeatability. This type of error cannot be compensated or calibrated, since it is by nature non-repeatable and therefore non-predictable. PI focuses on addressing this type of error when designing and building a motion system. The more repeatable a system can be built, the better the remaining errors can be dealt with through compensation methods.
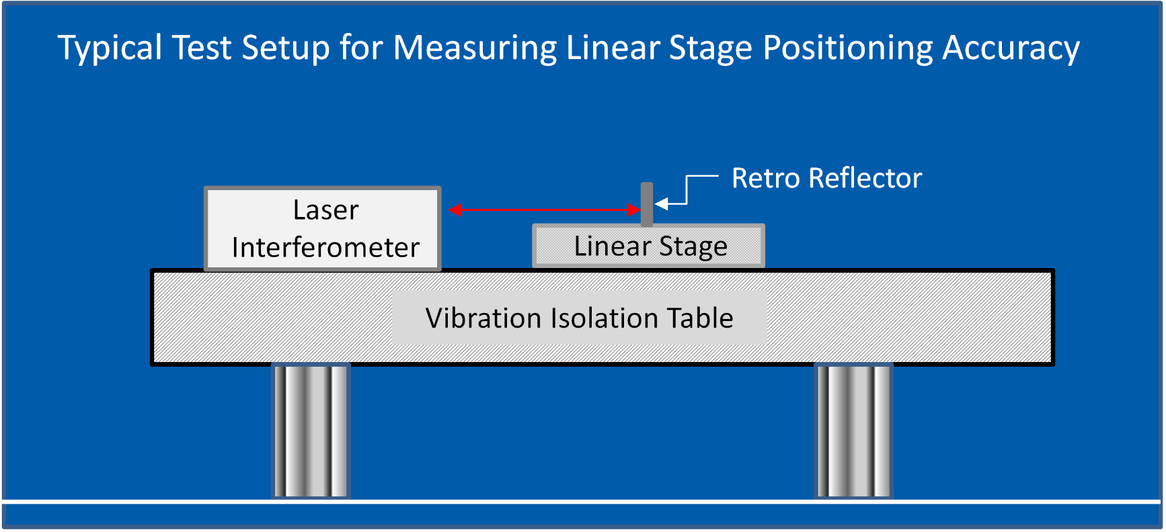
In order to get reliable data, high quality metrology equipment is required. For accurate linear measurements, laser interferometers are employed.

Non-linear errors are accuracy error motions that do not follow a straight line as the stage moves through its travel range. An example of an accuracy plot for a linear stage is shown below:
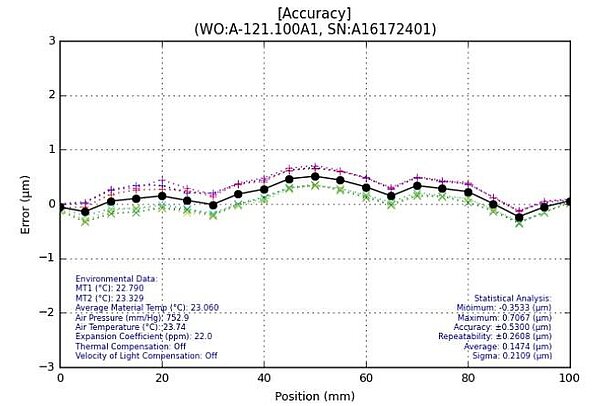
After we perform metrology on a system, we apply error compensation in the motion controller to calibrate (or correct) the repeatable positioning error of the system. If done well, the black line in the plot becomes a flat line at zero.
More on error compensation is available here »
Finally, there are linear errors. These are errors that are most commonly caused by thermal expansion effects. As the stage structure and encoders expand and contract with temperature changes, the flat straight line in the plot above becomes a diagonal line. However, since the error is linear, it can easily be addressed by applying a scaling factor to either the motion controller or in a machine vision system.
If this behavior is a concern for the respective application, a calibration routine can be built into the machine, where the stage is moved to a fixed point in space to look at a fiducial, then is moved to another 2 or 3 fiducials. The errors between the expected locations and measured locations are then calculated. The scale factor can then be adjusted based on these measurements. Such calibrations are usually done periodically, either at a fixed time interval (i.e. every 10 minutes) or in a process interval (i.e. before the start of each batch). Any changes in machine accuracy due to thermal effects are taken care of in this way.
It is not practical, except in very extreme (and costly) cases, to try and build a motion system that holds its accuracy over a wide temperature range without using a calibration routine such as described above.


